Christmas mornings are a flurry of anticipation, and few traditions capture that cozy magic quite like stockings hung by the chimney with care. But imagine the sheer delight and lasting memories when those stockings aren't just store-bought, but lovingly crafted by hand. That's the enduring charm of Stitched Christmas Stocking Ideas—they're more than mere decorations; they're unique handmade gifts, destined to become cherished family heirlooms.
Crafting your own Christmas stockings allows for unparalleled personalization, transforming a simple fabric shape into a tangible expression of love and creativity. Whether you're a seasoned sewist with a stash of festive fabrics or a curious beginner eager to learn, the world of handmade stockings is wonderfully accessible and deeply rewarding.
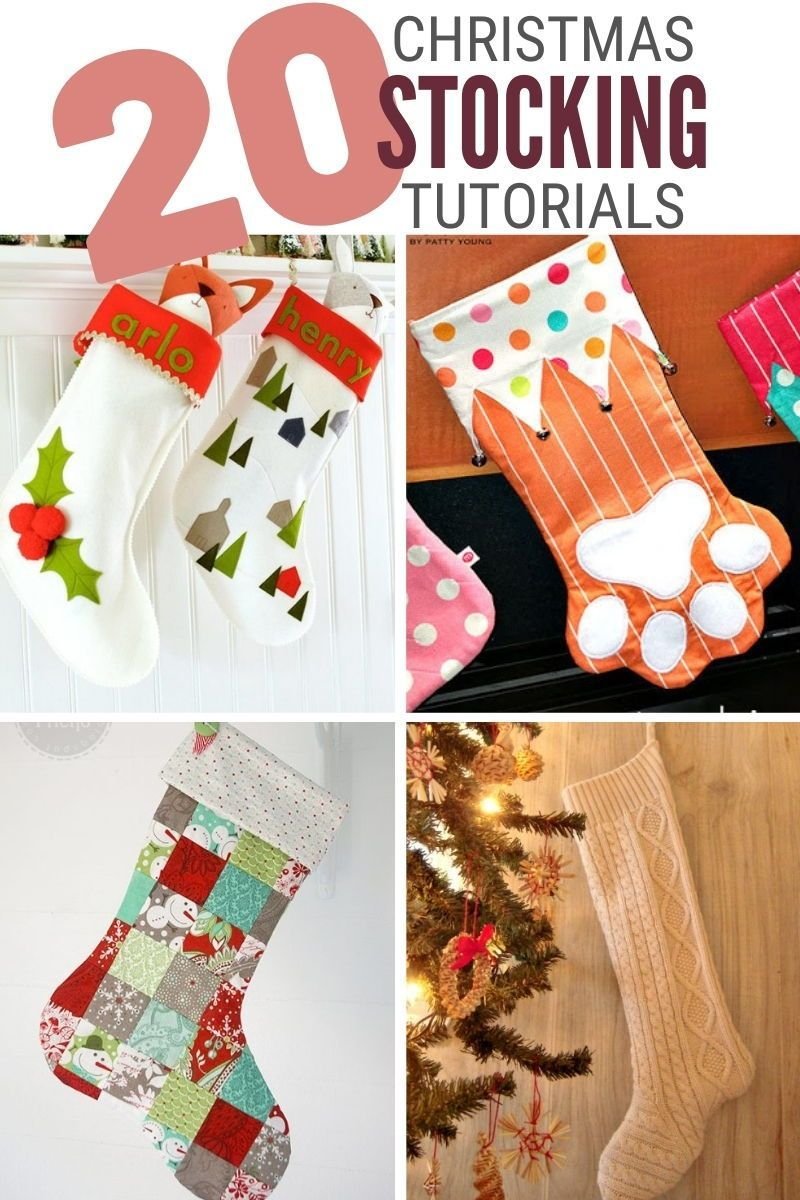
At a Glance: Crafting Your Perfect Stitched Christmas Stocking
- Start Simple: A basic lined stocking with a fold-over cuff is an excellent beginner project, mastering essential sewing techniques.
- Fabric Choices Matter: From durable cotton and cozy flannel to luxurious velvet and upcycled denim, your fabric defines the stocking's character.
- Quilting Adds Depth: Use patchwork, "quilt-as-you-go," or strip-piecing for texture, visual interest, and a lovely heirloom feel.
- Personalize with Flair: Embroidery, appliqué, reusable name tags, and even unique shapes like elf-inspired toes make each stocking one-of-a-kind.
- Lining is Key: For durability and a professional finish, almost all sewn stockings benefit from a lining.
- Don't Forget the Loop: A sturdy hanging loop is essential for holding those holiday treasures.
- Time Savers: Fleece stockings and assembly-line methods can have you finishing multiple stockings in record time.
Why Stitch Your Own Christmas Stockings? A Tradition of Love
In an age of mass production, there's a profound satisfaction in creating something with your own hands. Stitched Christmas stockings aren't just items; they're narratives, imbued with the time, thought, and care you pour into them. They become touchstones of holiday memories, pulled out year after year, each stitch holding a whisper of Christmases past.
Beyond sentimentality, handmade stockings offer practical advantages:
- Customization: You dictate the size, style, and colors, ensuring they perfectly match your holiday decor or the personality of the recipient.
- Durability: With quality materials and solid stitching, handmade stockings often outlast their store-bought counterparts.
- Sustainability: Upcycle old jeans or use fabric scraps, giving new life to materials and reducing waste.
- Skill Building: Each stocking offers an opportunity to learn new techniques or hone existing ones.
So, grab your sewing machine, thread, and a cup of festive cheer. Let's dive into a sleigh-full of Stitched Christmas Stocking Ideas that will inspire your next holiday crafting adventure.
The Foundation: Building a Classic Stitched Stocking
Before we explore an array of inspiring designs, let's lay the groundwork with the most common and robust construction method: the fully lined stocking with a cuff. This technique provides a polished finish, hiding raw edges and ensuring your stocking can hold plenty of treats for years to come.
Mastering the Classic Lined Design with Fold-Over Cuff
This timeless design (our first "ground truth" idea!) is the cornerstone of many variations. It’s durable, professional-looking, and allows for endless creativity with fabric choices.
What You'll Need:
- Coordinating outer fabric (cotton, flannel, fleece work beautifully)
- Lining fabric (often a plain cotton or flannel)
- Cuff fabric (can be a contrast or match)
- Optional: Heat-resistant batting for added durability and structure (especially good for holding heavier items).
The Basic Blueprint:
- Cut Your Pieces: You'll typically need two main stocking pieces (one mirrored), two lining pieces (also mirrored), and a rectangular cuff piece (around 9″ x 13.5″ for a standard stocking).
- Assemble the Outer Shell: Place your main fabric pieces right sides together (RST) and stitch around the sides and bottom, leaving the top open. Clip curves carefully for a smooth finish when turned.
- Construct the Lining: Do the same for your lining pieces, but remember to leave a 3″ turning gap along one straight edge of the lining. This gap is crucial for turning the entire stocking right side out later.
- Prepare the Cuff: Fold your cuff fabric in half lengthwise, RST, and stitch the short ends together to form a tube.
- The Professional Finish (Nesting Technique):
- Turn the main stocking outer shell right side out.
- Keep the lining wrong side out.
- Insert the main stocking into the lining (they will be RST).
- Now, insert the cuff tube between the main stocking and the lining, aligning all raw edges at the top. The cuff should also be RST relative to the main stocking.
- Pin all three layers securely.
- Stitch around the entire top edge, catching all layers.
- Carefully pull the entire stocking right side out through the 3″ opening in the lining.
- Stitch the lining opening closed by hand or machine.
- Push the lining into the outer stocking and press. Fold the cuff down.
Pro Tip: Don't forget a sturdy hanging loop! Attach it to the back seam of your outer stocking before you nest the layers, ensuring it’s securely stitched into that final top seam. This provides crucial support for all the goodies Santa will bring!
Beginner-Friendly Basic Stocking Pattern (Ground Truth #5)
If the nesting technique sounds a bit intimidating, start even simpler. A basic stocking pattern using just two main pieces and two lining pieces is a fantastic entry point. Use cotton or flannel for the outer fabric and a soft fleece for the lining.
- Cut two outer pieces (mirrored) and two lining pieces (mirrored).
- Sew outer pieces RST, leaving the top open. Clip curves.
- Sew lining pieces RST, leaving the top open and a 2-3 inch turning gap. Clip curves.
- Insert the lining into the outer shell, so they are RST.
- Stitch around the top edge, leaving an opening for turning.
- Attach the hanging loop securely before closing the final seam.
- Turn right side out and press.
This method often takes just 10-30 minutes, making it perfect for quick gifts or if you're making a batch.
A Gallery of Stitched Stocking Ideas: Designs for Every Style
Now that we understand the core construction, let's explore the exciting world of design. From traditional to whimsical, there's a stitched stocking idea for every home and personality.
1. Quilted Wonders & Patchwork Pizzazz
Quilting adds unparalleled texture, depth, and a cozy, heirloom feel to any stocking. It's also a brilliant way to use up fabric scraps!
Quilted Patchwork Stockings (Ground Truth #2)
Embrace the art of quilting by incorporating patchwork into your stockings. The "quilt-as-you-go" method is particularly efficient:
- Instead of quilting a finished piece, you sew fabric strips or squares directly onto a batting layer as you build each stocking piece. This simultaneously constructs your patchwork design and quilts it!
- Fabric Choices: Mini charm packs (2.5″ pre-cuts) are fantastic for this, offering a coordinated collection of small squares.
- Design Ideas: Arrange scraps randomly for an eclectic look, or coordinate colors. A structured approach might involve sewing four rows of four squares for each stocking side.
- Technique Tip: Use a walking foot on your sewing machine for consistent ¼” seam allowances and to help feed multiple layers evenly.
- Embellish: After quilting, consider decorative topstitching, buttons, or appliqué to add extra charm.
Plaid and Striped Quilted Stockings (Ground Truth #7)
For a traditional holiday feel, few things beat plaid fabrics.
- Striped Designs: If you're creating stripes, use the "quilt-as-you-go" method, mixing wide and narrow strips (between 1.5″ and 3″ wide) for dynamic visual interest. Layer plaid with coordinating solids for a rustic yet refined look.
- Patchwork Patterns: Classic quilt blocks like log cabin or spiral designs are perfect for using up plaid scraps and creating a rich, textured surface. These techniques maximize fabric efficiency and add a beautiful depth.
Pastel Christmas Stockings (Ground Truth #9)
Move beyond traditional reds and greens with a charming pastel palette.
- Color Scheme: Think soft pinks, powder blues, mint greens, and buttery yellows for a nostalgic, whimsical feel.
- Piecing Magic: Mini charm squares (2.5″ pre-cuts) are your best friend here, making quick work of patchwork assembly. Arrange them in straight rows or create diagonal "on point" piecing for a more dynamic look.
- Adding Dimension: Use fusible fleece between your cotton quilting prints and lining layers. This provides the quilted dimension without needing separate batting and stabilizes the lighter fabrics.
- Finishing Touches: Press seams flat and nest them for crisp intersections. Complete these sweet stockings with hand-embroidered names in pastel thread, delicate lace trim, or small fabric flowers for a truly unique heirloom.
Upcycled Denim and Cotton Batting Quilted Stockings (Ground Truth #14)
Combine sustainability with rustic charm by upcycling old jeans.
- Material Source: One adult-sized pair of jeans can yield at least two stockings and offers built-in details like pockets and belt loops that can be creatively incorporated (e.g., a belt loop for a hanging loop, or a pocket for extra treats).
- Technique: Use a heavy-duty needle for denim and consider spray or pin basting to secure cotton batting before quilting. A walking foot is invaluable for maintaining consistent quilting lines through the thick layers.
- Result: These stockings are incredibly durable, insulated, and possess a unique rustic appeal. Personalize them with embroidery, fun patches, or even intentional fraying for a distressed look. It's a fantastic eco-friendly crafting project!
2. Luxurious & Heirloom-Quality Fabrics
Sometimes, the fabric itself makes the statement. Elevate your stockings with richer materials for truly opulent creations.
Velvet and Brocade Stockings (Ground Truth #4)
For stockings that exude luxury and heirloom quality, velvet and brocade are unparalleled.
- Fabric Choice: Use home decor-weight versions for better durability and structure.
- Velvet Handling: When cutting velvet, always align the nap direction for consistent color saturation—strokes in one direction should feel smooth.
- Design Ideas: A velvet body with a contrasting brocade cuff (especially one with metallic threads) creates stunning visual interest.
- Skill Level: These fabrics require intermediate sewing skills due to their slipperiness and pile. Take your time, use plenty of pins, and consider a walking foot.
- Finishing: Always line these stockings for a professional finish and reinforce mounting loops, as these fabrics and their contents can be heavier. Embroidered monograms, beaded cuffs, or faux fur trim are elegant embellishments. Expect 1-2 hours per stocking for careful construction.
Bold Christmas Stripes (Ground Truth #10)
Make a striking visual impact with vibrant stripes.
- Color Palette: Stick to traditional red, green, and white for a classic look, or venture into modern hues like deep blues, oranges, or metallics.
- Clean Stripes: For professional-looking results, change colors on the right side of the fabric to avoid visible "dash" lines where one color peeks through another's seam.
- Visual Dynamics: Alternate wide and narrow bands for a more engaging and dynamic design.
- Fabric Weight: Chunky fabrics can provide quicker results and a plush, substantial finish, contributing to that bold aesthetic.
3. Modern & Whimsical Twists
For those who love contemporary design or a touch of playful fantasy, these ideas add a unique flair.
Modern Minimalist Geometric Stockings (Ground Truth #6)
If your decor leans contemporary, these sophisticated stockings will fit right in.
- Design Elements: Focus on clean lines and abstract shapes like triangles, hexagons, or chevrons. Achieve these through simple patchwork or appliqué.
- Color Palette: Opt for neutral palettes—white, beige, grey, charcoal, or rose gold—for an understated elegance.
- Fabric Choices: Cotton and linen blends add subtle texture and a refined feel.
- Construction Tip: Piece your geometric design onto a larger fabric block first, then lay your stocking pattern piece over it and cut out the shape. This ensures perfect alignment and makes design placement much easier.
- Embellishment: Keep it minimal. A single embroidered initial in a crisp sans-serif font is often all that's needed.
Asymmetrical Toe (Elf-Inspired) Stockings (Ground Truth #13)
Inject some playful whimsy with dramatically angled, curled toes.
- Fabric Structure: High-structure fabrics like felt or velvet work best, reinforced with batting in the toe sections to maintain those sculptural curves.
- Sewing Tips: Pin toe sections securely before sewing. Carefully notch curved seam allowances after stitching to prevent puckering when you turn the stocking right side out.
- Highlighting Asymmetry: Use contrasting metallic fabrics on the toe or cuff to draw attention to the unique shape. Add small bells to the tip for a festive jingle, or playful embroidery.
- Finishing Touch: A pointed "elf cuff" can complete the fantasy motif. Remember to create a strong hanging loop, as the exaggerated toe might add some extra weight when filled.
4. Practical & Personal Touches
Make your stockings truly special and functional with personalized elements and thoughtful additions.
Personalized Name Embroidery (Ground Truth #11)
Nothing says "this is yours" quite like an embroidered name. This is a must for turning a stocking into a treasured keepsake.
- Timing is Key: Embroider the cuff before assembling the stocking. This makes hooping for machine embroidery easier and allows for simpler hand embroidery.
- Fabric Stability: Use stable fabrics like flannel or felt for cuffs, as they handle embroidery well. If using a thinner fabric, consider a tear-away stabilizer.
- Hand Embroidery: A chain stitch is excellent for lettering, and French knots can add charming accents.
- Machine Embroidery: Offers precision within a typical 3″ x 5″ design area. Always verify proper hooping and alignment for perfectly centered names.
- Placement: Names are traditionally positioned on the upper left or right quarter of the cuff.
- Fonts & Motifs: Choose from cursive, block, or decorative fonts. Pair monograms with small festive motifs like snowflakes or holly for extra charm. You can find many lovely examples and patterns to Explore all things Stitch Christmas in your local craft store or online.
Reusable Name Tag Attachments (Ground Truth #15)
For heirloom stockings intended for changing family members or growing families, reusable name tags are a brilliant solution.
- Versatility: This approach solves the challenge of keeping heirloom stockings adaptable for years to come.
- Tag Materials: Use wooden die-cut tags, felt pieces with eyelet punches (for threading ribbon or twine), or even small fabric squares.
- Personalization:
- Embroidered Names: Stitch names directly onto felt tags.
- Vinyl Lettering: Apply vinyl cutouts to wooden tags.
- Chalkboard Paint: Paint wooden tags with chalkboard paint for erasable, re-writable surfaces—perfect for seasonal messages or quickly changing names.
- Attachment Methods:
- Ribbon/Twine: Simple and classic.
- Hook-and-loop fasteners (Velcro): Offers secure yet repositionable options.
- Snap Buttons or Magnetic Closures: More discrete and very secure.
- Beyond Stockings: These removable tags can also double as ornaments or gift tags, extending their usefulness.
5. Mini Versions & Quick Makes: Stitched Stockings in a Flash
Sometimes you need a quick project, a small gift, or simply want to maximize your fabric scraps.
Mini Versions (Ground Truth #3)
Don't underestimate the charm and versatility of mini stockings!
- Size: Ranging from 3.5″ to 6.5″ tall, they're adorably small.
- Perfect For: Gift cards, jewelry, small treats, or even as decorative ornaments.
- Stash Busting: They require only fabric scraps or fat eighths, making them ideal for using up leftover festive fabrics.
- Construction: Typically a simple layering method: exterior, lining, and cuff sewn with 1/4″ seam allowances.
- Personalization: Even small, they can be personalized with tiny embroidery, appliqué, or contrasting cuffs in faux fur or velvet.
- Creative Uses: Use them as advent calendar pockets, unique party favors, or heartfelt teacher gifts.
Quick, Under-an-Hour Stockings (Ground Truth #12)
When time is of the essence, these methods will have you hanging stockings in no time.
- Fleece Stockings: The absolute fastest option. Fleece doesn't fray, so it requires no lining or edge finishing. Simple two-piece construction and a hanging loop are all you need. Embellishments can be added afterward.
- Quilted with Grid/Strips: Using a pre-quilted fabric or quickly strip-piecing a front panel (with batting for durability) can achieve a professional polish quickly.
- Patchwork Fronts: Efficiently use fabric scraps (e.g., piece 3″ squares into a panel) for the front, then pair with a plain backing for speedy assembly. This gives the look of patchwork without quilting the entire stocking.
- Assembly-Line Method: If you're making multiple stockings, streamline your process! Cut all pieces for all stockings at once. Then, perform each sewing step for all stockings (e.g., sew all main seams, then all lining seams, then all cuffs) before moving to the next. This significantly reduces per-stocking time.
Fully Lined Designs with Contrasting Cuffs (Ground Truth #8)
This variation of the classic lined design focuses on achieving an impeccable finish, inside and out.
- Symmetry: Cut the main stocking as a single piece (folded fabric, then cut along fold) for perfect symmetry, or use mirrored pieces.
- Cuff Detail: Split the lining and cuff at the cuff line if you want a distinct cuff section. This prevents bulkiness at the cuff junction.
- Clean Edges: Position cuffs right sides facing the stocking, then flip for beautifully clean, finished edges.
- Seam Allowances: Pay attention to your seam allowances—3/8 to 5/8 inch are common, allowing for durable seams.
- Cuff as Canvas: These contrasting cuffs are ideal for personalized name embroidery, appliqué, or monograms.
- Fabric Blends: Mix cotton blends, velvet, fleece, or corduroy with brights, metallics, or faux fur for stunning visual contrasts.
Beyond the Basics: Advanced Tips for Stitched Stocking Success
Even with a basic pattern, a few expert insights can elevate your handmade stockings from good to truly exceptional.
Choosing Your Fabrics Wisely
The fabric dictates not just the look but also the drape, durability, and ease of sewing.
- Cotton/Flannel: Beginner-friendly, wide variety of prints, easy to press. Great for classic, quilted, and pastel stockings.
- Fleece: Quick to sew (no fraying), soft, cozy. Perfect for quick stockings or lining.
- Velvet/Brocade: Luxurious, but requires careful handling (slippery, nap direction, needs pressing cloth). Use for heirloom pieces.
- Denim: Durable, perfect for upcycling, requires a heavy-duty needle and often a walking foot.
- Quilting Cotton: Ideal for patchwork due to its stable weave and wide array of designs.
- Lining Fabrics: Always choose something smooth and durable like plain cotton, flannel, or even a slippery polyester for easy gift insertion.
Perfecting Your Stitch
- Seam Allowances: Be consistent! A precise 1/4" or 1/2" seam allowance makes a huge difference, especially when joining multiple pieces.
- Clipping Curves: After sewing curved seams, snip small V-shapes into the seam allowance on convex curves and notches (small cuts) into concave curves. This prevents bulk and allows the fabric to lay flat when turned.
- Pressing: Pressing seams open or to one side after every step makes for crisp, professional-looking results. Don't skip it!
- Reinforce: Always backstitch at the beginning and end of seams, especially on the hanging loop, to secure them.
Making It Last: Care and Storage for Your Stitched Masterpieces
You've poured your heart into these stockings; now ensure they last for generations.
Cleaning Your Stockings
- Check Fabric Content: Always consider the care instructions of your chosen fabrics.
- Spot Clean First: For small marks, spot clean with a gentle fabric cleaner or mild soap and water.
- Hand Wash/Delicate Cycle: For full cleaning, hand wash in cold water with a mild detergent, or use your machine's delicate cycle in a mesh laundry bag.
- Air Dry: Always air dry flat or hang to prevent shrinking or damage, especially for velvet or anything with delicate embellishments. Avoid direct sunlight.
Storing for the Seasons
- Clean Before Storing: Ensure stockings are completely clean and dry before packing them away to prevent mildew or stains.
- Gentle Folding: Fold them gently to minimize creases. Avoid stuffing them into tight spaces.
- Breathable Storage: Store in breathable cotton bags, acid-free tissue paper, or clear plastic bins in a cool, dry place. Avoid direct sunlight which can fade fabrics.
- Flat Storage for Embellishments: If your stockings have delicate appliqués, beads, or other dimensional embellishments, consider storing them flat or individually wrapped to prevent crushing.
Your Next Stitching Adventure Awaits
From the simplest fleece design to intricate quilted masterpieces, the joy of Stitched Christmas Stocking Ideas lies in the making. Each stitch carries a story, each fabric choice reflects personality, and each finished stocking is a unique beacon of holiday cheer.
Whether you're crafting a new set for your growing family, creating personalized gifts for loved ones, or simply indulging in a bit of creative self-care, these ideas offer a rich tapestry of possibilities. So, pull out your sewing machine, gather your fabrics, and embark on a rewarding journey that will bring warmth and handmade magic to your holiday season for years to come. Happy stitching!