There’s a unique magic that permeates a home adorned with handmade Christmas decorations. The subtle scent of pine, the warm glow of lights, and the undeniable charm of a lovingly crafted ornament evoke a sense of nostalgia and personal touch that store-bought items simply can’t replicate. And when it comes to bringing that homespun warmth to life, DIY Felt Christmas Decorations stand in a league of their own. They’re forgiving, infinitely customizable, and wonderfully simple, making them the perfect project for crafters of all ages and skill levels, even if your stitches go a little crooked – often, that's part of their charm!
Imagine a twinkling tree adorned with soft felt stars, a mantel draped with a garland of cheerful gingerbread men, or thoughtful little felt tags adding a personal flourish to your gifts. Felt crafts transform simple materials into cherished keepsakes, infusing your holiday season with warmth and heartfelt beauty.
At a Glance: Crafting Your Felt Christmas Wonderland
- Effortlessly Charming: Felt is forgiving and easy to work with, making beautiful results accessible to everyone.
- Budget-Friendly: Create stunning decor without breaking the bank, using readily available and inexpensive materials.
- A Joy for All Ages: Simple shapes and basic stitches mean kids can join the fun, fostering cherished family crafting traditions.
- Versatile Design: From classic reds and greens to modern pastels, felt adapts to any aesthetic.
- Durable & Reusable: With proper care, your felt creations will last for many Christmases to come.
- Personal Touch: Infuse your unique style and stories into every piece, creating truly meaningful decorations.
Why Felt? The Enduring Appeal of a Handmade Christmas
Why has felt become such a beloved medium for holiday crafting? The answer lies in its inherent qualities: it’s soft, cozy, and comes in an astonishing array of colors and patterns. Unlike woven fabrics that fray, felt holds its shape beautifully when cut, eliminating the need for complex hemming. This means you can cut even intricate designs and stitch them with ease, focusing on creativity rather than wrestling with fabric edges.
Felt crafts embody everything wonderful about a handmade Christmas: they’re budget-friendly, incredibly easy to master, and wonderfully forgiving. A misplaced stitch or a slightly uneven cut doesn't detract from the charm; instead, it adds to the unique character and warmth of the piece. This makes felt an ideal choice for families, offering a low-stress way to engage children in the creative process and produce something genuinely festive. Plus, felt creations are remarkably durable and store beautifully, ensuring your efforts bring joy year after year.
Your Essential Felt Crafting Toolkit
Before you dive into a wonderland of felt, let’s gather the basic tools and materials you'll need. Think of this as your craft arsenal, ready to transform simple sheets of felt into festive masterpieces.
- Felt Sheets: Available in acrylic (more budget-friendly, vast color range) or wool blend (softer, richer feel, a bit pricier). Acrylic felt is perfect for beginners and kids, while wool blends offer a more luxurious finish. Stock up on classic Christmas colors (deep reds, forest greens, whites, golds) and consider some unexpected shades like blush pink, mustard, or icy blues for a modern twist.
- Sharp Scissors: A good pair of fabric scissors makes all the difference for clean, precise cuts. Keep them designated for fabric only to maintain their sharpness.
- Embroidery Needles: Smaller eyes for embroidery floss, larger eyes for thicker threads. A variety pack is helpful.
- Embroidery Floss: This is your artistic palette! Choose colors that complement your felt, whether for stitching seams, adding details like snowflakes or frosting, or creating facial features. Regular sewing thread works for basic construction, but floss adds a lovely texture.
- Stuffing: Soft cotton batting or polyester fiberfill is essential for creating plump, 3D plushies and ornaments.
- Fabric Glue: While stitches are charming, a dab of fabric glue can significantly enhance durability, especially for small details or when securing pieces that might see a lot of handling. Look for quick-drying, clear-drying options.
- Templates & Stencils: Cookie cutters are a secret weapon for perfectly symmetrical shapes like stars, bells, or gingerbread men. You can also print or draw your own templates on paper or cardstock.
- Embellishments: This is where the magic truly happens!
- Beads & Sequins: Tiny, sparkling additions that catch the light.
- Mini Pom-Poms: Perfect for berries, noses, or cheerful accents.
- Small Buttons: Great for eyes, gingerbread man tummies, or decorative accents.
- Ribbons & Twine: For hanging ornaments, creating loops, or adding bow ties.
- Fabric Paint: Use it for rosy cheeks, sparkly details, or "icing" effects.
- Fabric Markers: Ideal for personalizing items with names or small details.
Mastering the Basics: Techniques for Flawless Felt Creations
Felt crafting is wonderfully forgiving, but a few foundational techniques will elevate your creations from charmingly rustic to truly polished.
Precision Cutting: The Foundation of Form
The cleaner your cut, the neater your finished piece will look.
- Use Templates: Whether a cookie cutter, a printed design, or a shape you've drawn, a template ensures consistency. Trace your shape onto the felt with a fabric marker or a fine-tipped pen.
- Sharp Scissors: This cannot be overstated. Dull scissors will chew and fray the felt, making clean edges impossible.
- Cut Smoothly: Try to cut in long, continuous strokes rather than short, choppy ones, especially on curves.
Stitching: Adding Structure and Style
Basic stitches are all you need, but learning a couple of key ones will give your creations a professional touch.
- The Running Stitch: This is the simplest stitch, perfect for joining two pieces of felt together or adding decorative lines. It's a series of small, even stitches that "run" in and out of the fabric. It's fantastic for details like "icing" on a gingerbread man or outlining shapes.
- The Blanket Stitch: The go-to stitch for finishing edges, the blanket stitch creates a neat, decorative border that's also incredibly durable. It helps prevent felt pieces from pulling apart and adds a classic, handmade aesthetic. Practicing this stitch will pay dividends, giving your ornaments a strong, clean edge. For those looking to refine their needlework, mastering basic embroidery stitches for felt opens up a world of intricate possibilities.
- Combining Glue & Stitch: For items that need extra durability, or for small pieces you don’t want to hand-stitch, apply a thin line of fabric glue along the edges before stitching. This provides a strong bond, and the stitches offer reinforcement and that desirable handmade look. For elements like tiny eyes or a reindeer nose, a dab of glue might be sufficient, reinforced by a single, tiny stitch.
Stuffing for Dimension
When creating 3D items like plushies or puffy ornaments, stuffing is key.
- Less is More (Sometimes): For flat ornaments, a very light layer of stuffing gives a subtle dimension without making it bulky.
- Firm but Not Stretched: For plushies like Santa or a snowman, stuff firmly enough to hold shape but avoid overstuffing, which can distort your stitches and create bumps. Use small pieces of stuffing and gently push them into corners and curves.
Layering for Depth
Layering different felt pieces adds wonderful depth and detail without complex stitching. Think of creating a Santa with a separate hat and beard layered onto the face, or a wreath made of overlapping felt leaves in different shades of green. Secure layers with a few stitches or fabric glue.
Embellishing: The Finishing Touches
This is where your decorations truly come alive!
- Embroidery Floss: Use contrasting floss to embroider details like snowflakes, sprigs of holly, "frosting" on cookies, or cheerful faces. Tiny stitches create intricate patterns.
- Beads & Sequins: Sew on tiny beads or sequins to add sparkle and catch the light. They can mimic berries, create dazzling patterns, or simply add a touch of glamour.
- Fabric Paint: A small dot of pink fabric paint can give your gingerbread man rosy cheeks. Glitter fabric paint adds extra holiday cheer.
- Mini Pom-Poms: These are perfect for Santa's hat, reindeer noses, or holly berries.
- Buttons: Small buttons are charming accents, especially for snowman "coal" buttons or gingerbread men.
Playing with Color
Don't underestimate the power of color in felt crafting.
- Classic Combinations: Deep reds, forest greens, crisp whites, and golds instantly evoke traditional Christmas cheer.
- Artsy & Modern: Experiment with blush pinks, mustard yellows, teal, or muted grays for a contemporary aesthetic.
- Shades for Depth: Using different shades of one color (e.g., white and pale blue for snowflakes, deep and light greens for wreaths) adds richness and visual interest without introducing too many new colors.
From Simple Stars to Storybook Scenes: Inspiring Felt Decoration Ideas
Now for the fun part: turning your skills into stunning decorations! Here are some creative ideas to spark your imagination, ranging from simple ornaments to elaborate centerpieces.
Ornaments Galore: Hanging Happiness on Your Tree
Your Christmas tree is a canvas waiting to be adorned with your unique felt creations. These ornaments are often quick to make and incredibly rewarding.
- Felt Christmas Tree Ornaments: Start with classic shapes: stars, bells, miniature sweaters, stockings, or candy canes. Cut two identical shapes, stitch them together, and lightly stuff them for a soft dimension. Embellish with beads, sequins, or simple embroidery. Consider designs with embroidered "baubles," sparkly accents, or charming chunky stitches. For more specific inspiration, explore ideas for felt Christmas tree ornaments that truly stand out.
- Felt Reindeer Ornament: Draw a friendly rounded body with tiny legs and oversized antlers. Stitch two body pieces, stuff lightly, then attach separately stitched antlers for better stability. A bright red felt nose (hello, Rudolph!) is a must, and tiny black stitches for eyes bring character. Personalize with small fabric marker names or a tiny ribbon bow tie.
- Felt Gingerbread Man: Cut two gingerbread man shapes, stitch around the edges, leaving a small opening for stuffing. Add "icing" details with white embroidery thread or fabric paint, and a goofy smile. Small buttons make adorable tummy accents. Attach a loop of ribbon before fully stuffing for easy hanging.
- Felt Stocking Ornaments: Choose festive colors like red, green, or cream. Cut a simple stocking shape and stitch a contrasting felt cuff at the top. These are perfect for embroidering initials, making them thoughtful place-setting markers for your holiday table or miniature gift holders.
- Snowy, Embroidered Ornaments: Use soft white, cream, or pale blue felt. Embroider delicate snowflakes, sprigs of pine, or tiny winter berries with contrasting floss for a sophisticated, wintry look.
- Whimsical Felt Christmas Tree Ornament: A delightful design featuring embroidered baubles, a tiny trim garland, and a cheerful ribbon loop for hanging. It’s a tree on your tree!
- Bold Felt Star: Use vibrant felt colors for a striking star. Add gold stitched lines radiating from the center and scatter tiny sequins for extra sparkle. A candy-striped loop completes the playful look.
- "Frosted Cookie" Felt Ornaments: Mimic the look of real frosted cookies! Use actual cookie cutters to trace shapes, stitch two felt pieces together, and add "sprinkles" with colorful embroidery floss or tiny beads.
- Felt Pickle Ornament: This whimsical tradition comes to life in felt! Use quality green felt, add French knots for texture, and finish with a simple whip stitch around the edge. A fun, conversation-starting addition to your tree.
- Patchwork Felt Sweater Ornament: Cut small, irregular felt shapes in various colors. Arrange them like a quilt on a sweater-shaped base and stitch them down with a running stitch or blanket stitch for a cozy, homespun effect.
- Dimensional Felt Bauble: Cut several felt circles in different colors. Fold them in half, then stitch them together along the folded edge. When opened, they fan out into a beautiful 3D spherical shape.
- Mistletoe Heart: Layer different sizes of green felt leaves into a heart shape. Add small white felt circles or tiny beads for berries, and finish with a bright red bow at the top for a touch of romance.
- Beaded Felt Star Sugar Cookie: A simple star template becomes extraordinary with bead "sprinkles" stitched across its surface, creating a subtle shimmer reminiscent of a real sugar cookie.
- Happy Little Felt Tree: This ornament radiates joy! Start with a simple tree shape, add a glittery star, use embroidery floss for blush details, and perhaps metallic thread for garlands.
- Sparkly Set of Felt Classics: Craft a collection of trees, stars, snowmen, and gingerbread friends, all unified with starburst embroidery and delicate bead details. These make for a cohesive and dazzling display.
- Chunky Stitched Felt Star: A soft felt star with pronounced, visible stitched lines radiating from the center. Add a small contrasting felt circle in the middle for a charming, woodsy touch.
- Loose-Looking Felt Christmas Tree Shapes: Embrace a rustic aesthetic with tree shapes that have slightly frayed edges and visible, simple stitching. A thin cord or thread can be used as a minimalist garland.
- Felt Christmas Baubles with Layers of Embroidery: Create elegant round ornaments. Use embroidery to add intricate leafy shapes, pinecones, or swirling patterns, giving them a vintage, heirloom quality.
- Felt Baubles Studded with Bright Holiday Colors: Take classic round felt baubles and stitch leafy or abstract felt shapes onto them, using contrasting bright colors. Finish with a vibrant hanging loop.
- Simple Felt Owl Ornament with Button Eyes: Layer different shades of felt to create the owl's body, wings, and belly. Use small stitches to mimic feathers, and two charming buttons for eyes, giving it a sweet, curious expression.
- Felt Ice Skates: Cut boot shapes from felt, add contrasting felt blades, and stitch on laces for a nostalgic, retro feel. These evoke childhood winter memories.
- Felt Ornaments Resembling Sweet Little Candies: Get creative with felt "lollipops" by swirling different colors and stitching them onto a stick, or tie felt strips together to resemble wrapped candies. Hang with bright ribbons.
- Friendly Felt Stars with Faces: Cut simple star shapes. Use tiny beads for eyes, embroider a gentle smile, and add rosy cheeks with a touch of fabric paint or a few pink stitches for a soothing, calm expression.
Garlands & Banners: Festive Flair for Every Space
Garlands are fantastic for adorning mantels, doorways, or even stringing across windows.
- Felt Snowflake Garland: Cut snowflakes in different sizes and shades of white and pale blue. Trace shapes (cookie cutters are excellent for this!). Stitch around the edges for added sturdiness, then string them onto thick twine, gluing them at slight angles for a lovely draping effect. A touch of sparkle fabric paint can make them shimmer. For comprehensive instructions, check out a step-by-step guide to creating your own felt garland.
- Felt Candy Cane Garland: Stitch red and white felt stripes onto cane-shaped felt pieces, then lightly stuff them. Alternate sizes for a playful visual rhythm. For a super clean look, you can also glue the stripes instead of stitching.
- Felt Holly Garland with Pom-Pom Berries: Cut numerous holly leaves from green felt. Fold them slightly down the center for dimension, then attach small red (or even white) pom-poms for berries. String them together or glue them onto a longer felt strip.
Plushies & Centerpieces: Adorable Accents
These larger felt creations can become charming focal points or delightful gifts.
- Felt Santa Plush: This project is incredibly rewarding. Cut basic front-and-back Santa shapes. Layer felt pieces for his hat, beard, nose, and belt. Stuff with cotton for a plump, cuddly feel. Add details like mini pom-poms on his hat or fabric paint for rosy cheeks. These look adorable on shelves, under the tree, or as cherished gifts. To take your soft toy crafting to the next level, consider exploring advanced felt plushie techniques.
- Felt Nativity Set: A thoughtful and serene project using soft, muted colors for robes, headscarves, and figures. Layer felt pieces for depth and dimension. Stitching tiny, serene faces is a rewarding detail. This set makes a beautiful family keepsake and a wonderful, kid-friendly centerpiece on a wooden tray – no worries about breakable figures!
- Felt Snowman Plush: A simple shape made from two stacked circles. Add a colorful felt scarf, coal-like buttons (tiny black felt circles or actual buttons), and brown felt strips for arms. Stuff softly to keep him round and squishy. Great for shelf décor or as a festive companion.
- Needle-Felt Mini Snowmen: For those looking for a different texture, needle-felting wool into soft circles creates charming, compact snowmen. Finish with tiny stitched mouths and carrot noses. This technique requires a little patience but produces beautifully detailed results.
- Woodland Bunny: Layer small felt pieces to create clothing for a sweet woodland bunny. Add rosy cheeks using embroidery thread and use tiny stitches for the facial features. These can be part of an enchanted forest theme.
- Enchanted Woodland Ornament Set: Go beyond the traditional with a set featuring hedgehogs, foxes, mushrooms, and fairies. Focus on details like tiny berries, textured felt clothing, and delicate embroidery to bring these whimsical characters to life.
Practical & Pretty: Felt for Everyday Holiday Use
Felt isn't just for hanging; it can add festive cheer to your daily routines.
- Felt Christmas Wreath: Start with a foam or cardboard ring as your base. Layer felt leaves (using deep green with lighter shades for depth) to create a full, lush wreath. Embellish with felt berries, stars, bows, or even a mini felt Santa face. Overlap leaves tightly for a truly abundant appearance.
- Felt Star Hangings: Use gold, cream, and soft yellow felt to create elegant stars. Cut two star shapes, stitch them, and lightly stuff. Hang them vertically on a long ribbon, adding tiny sequins for a subtle, warm shimmer. These look beautiful cascading in a window or against a plain wall.
- Felt Table Coasters: Felt is naturally soft and absorbent, making it ideal for coasters. Cut them in festive shapes like trees, stars, or snowflakes. Stitch a contrasting border for a neat finish, or glue two layers of felt together for extra strength and durability. For even more ways to deck out your dining space, check out more felt table decor ideas.
- Felt Gift Toppers: Instead of disposable bows, create reusable felt toppers! Cut small shapes like hearts, stars, mini wreaths, or bows. Attach them to gifts with ribbon. They can be coordinated with your wrapping paper or hand-stitched with initials for a truly personalized present.
- Mini Felt Gingerbread Village: Create a charming display of tiny felt houses. Use different felt colors for walls and roofs, white stitches for "frosting" details, and tiny candy cane accents. This makes an adorable tabletop centerpiece.
- Cozy Felt Gingerbread House: A more ambitious project, this larger gingerbread house can be embellished with intricate embroidered "icing" details, a small felt wreath on the door, and tiny felt gingerbread people. It's a true showstopper.
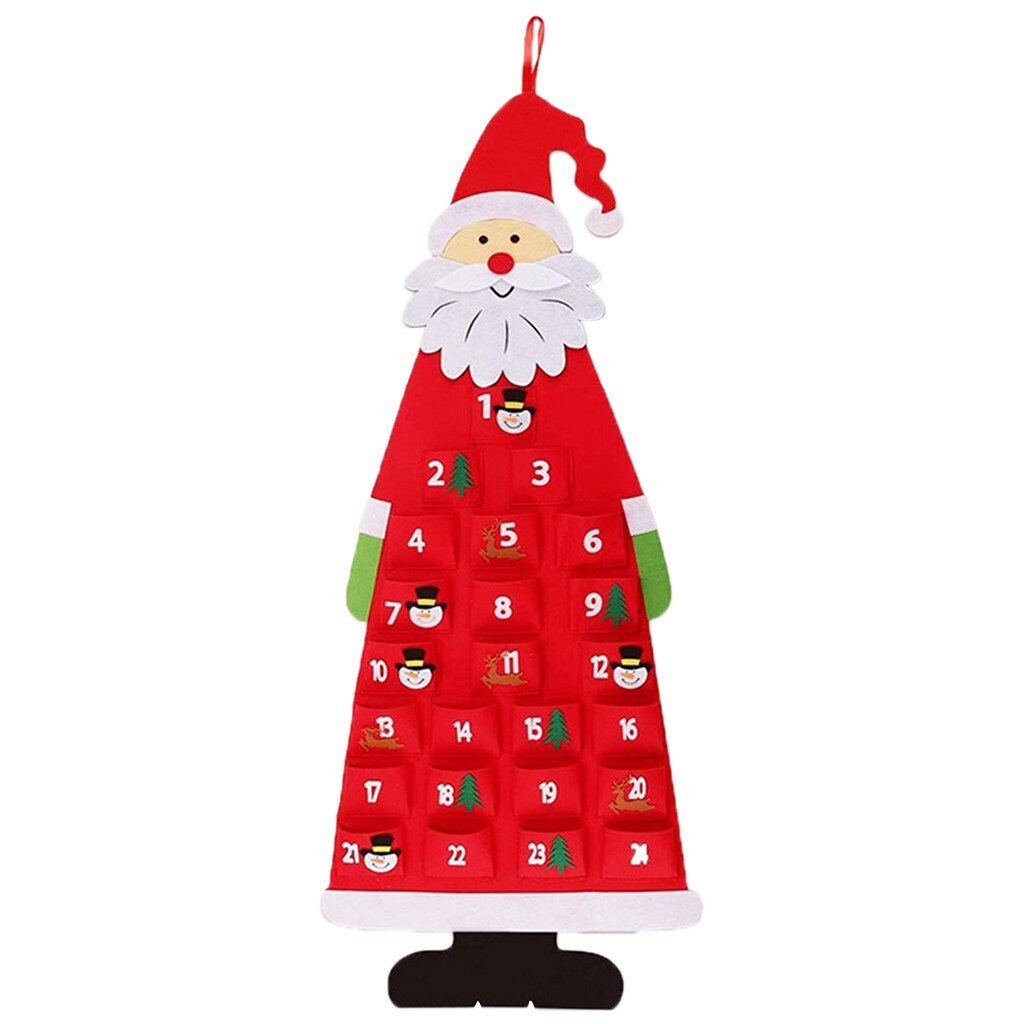
- Felt Advent Calendar: A large felt background forms the base, onto which you stitch or glue small, numbered pockets. Fill each pocket with a small felt shape, a note, or a tiny candy for a delightful daily surprise leading up to Christmas. Secure a wooden dowel at the top for easy, flat hanging.
Pro Tips for Durability and Lifespan
You've poured your heart into these creations; now ensure they last for many Christmases to come.
- Layering for Strength: For items that might see more handling (like coasters or larger plushies), gluing two layers of felt together before stitching adds significant strength and body.
- Reinforce Hanging Loops: When adding a ribbon or twine loop for hanging, make sure to stitch it securely between the two felt layers or reinforce it with extra stitches and a dab of glue. You don't want your beautiful ornament to fall!
- The Right Stuffing: For 3D items, ensure they are stuffed firmly enough to hold their shape, but not so tightly that the felt stretches or seams pull. Even stuffing prevents lumps and bumps.
- Smart Storage: The biggest enemy of felt is dust, moisture, and pests. Store your felt creations in airtight bags or rigid boxes in a cool, dry place when they're not in use. This protects them from damage, keeps them clean, and preserves their vibrant colors. Adding a silica gel packet can help absorb any lingering moisture.
Common Questions & Troubleshooting
Even seasoned crafters have questions! Here are answers to some common felt crafting dilemmas.
What kind of felt should I use for Christmas decorations?
For most DIY Christmas decorations, acrylic felt is a fantastic, budget-friendly choice. It comes in a huge range of colors, holds its shape well, and is durable. If you want a softer, more luxurious feel (and don't mind a slightly higher cost), a wool blend felt is beautiful. For items that need a bit more stiffness, thicker craft felt or even a felt backed with fusible interfacing can provide extra body.
How do I make my stitches even and neat?
Practice! Start with larger stitches to get the rhythm, then gradually make them smaller. For blanket stitch, aim to keep your needle coming up at the same distance from the edge and the same height from the previous stitch. Using a ruler or drawing light, erasable guide lines can help beginners. Don't be afraid to unpick and re-do if you're not happy – it's part of the learning process.
My felt pieces are pulling apart after stitching. What went wrong?
This often happens if your stitches are too far apart, or if you're using too thin a thread for an item that will see a lot of stress.
- Closer Stitches: Ensure your stitches are close enough together to create a secure seam.
- Combine Glue & Stitch: As mentioned earlier, a thin line of fabric glue applied before stitching provides an excellent base bond, and your stitches then reinforce it.
- Use Embroidery Floss: Embroidery floss is thicker and stronger than regular sewing thread, offering more robust seams for felt.
Can kids really make these DIY felt decorations?
Absolutely! Felt is one of the best materials for children's crafts. Start with very simple shapes (cut them out beforehand if younger kids are involved) and focus on basic running stitches or even just fabric glue. Adding embellishments like pre-cut shapes, pom-poms, or buttons is super fun for little hands. It’s a wonderful way to foster creativity and fine motor skills.
Your Journey to a Heartfelt Holiday Home
Crafting DIY Felt Christmas Decorations is more than just making pretty things; it’s about creating memories, adding personal touches to your home, and embracing the joy of a handmade holiday. Each stitch, each embellishment, carries a piece of your warmth and care, transforming simple felt into cherished heirlooms.
Don’t worry about perfection; embrace the handmade charm that comes with every unique piece. Start with a simple star or a gingerbread man, and let your creativity unfold. Soon, you'll find your home filled with unique decorations that tell a story, spark conversations, and bring a special kind of comfort that only handmade items can provide.
For those eager to delve deeper into the vast world of holiday needlework, a comprehensive resource awaits. You'll find a wealth of techniques, inspiration, and projects that extend beyond felt, ready to guide you on your crafting journey. Dive into Your guide to Christmas stitching to continue building your skills and discover even more ways to infuse your holidays with handmade joy. Happy crafting!